Blog

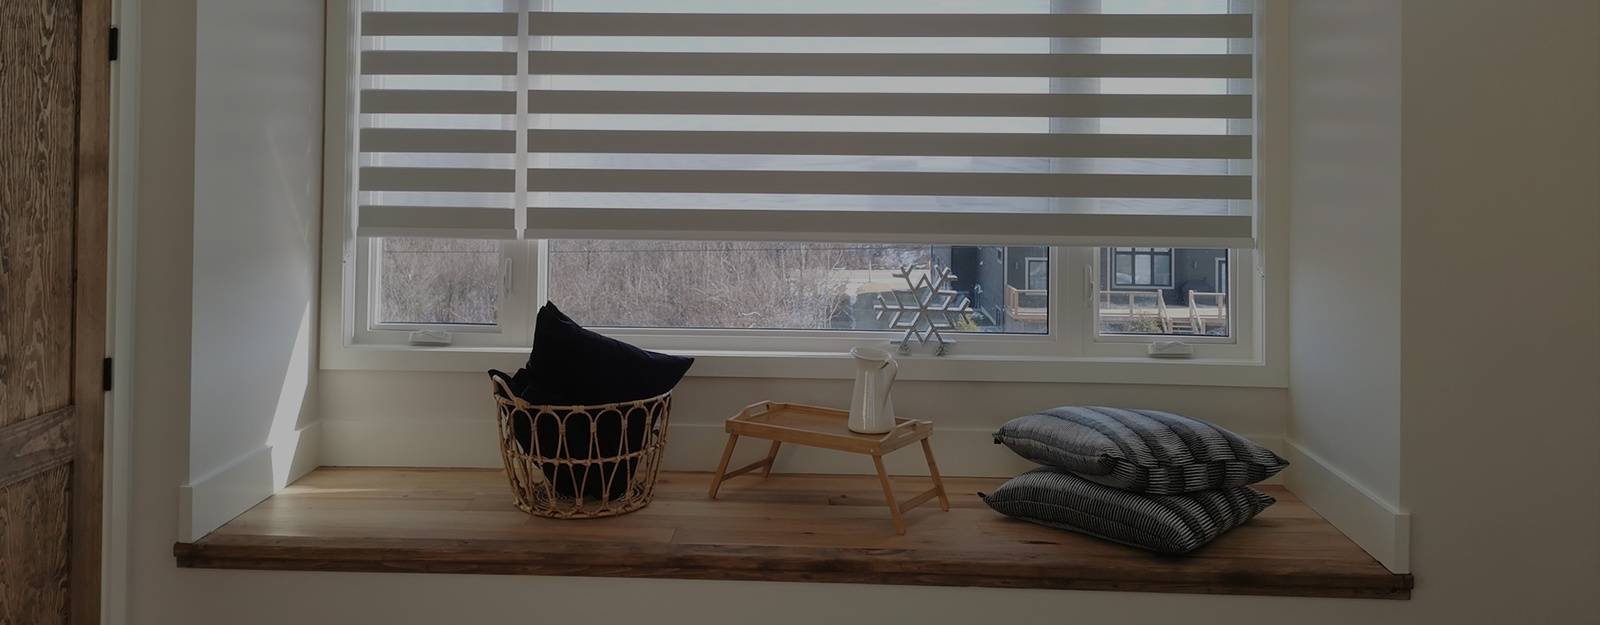
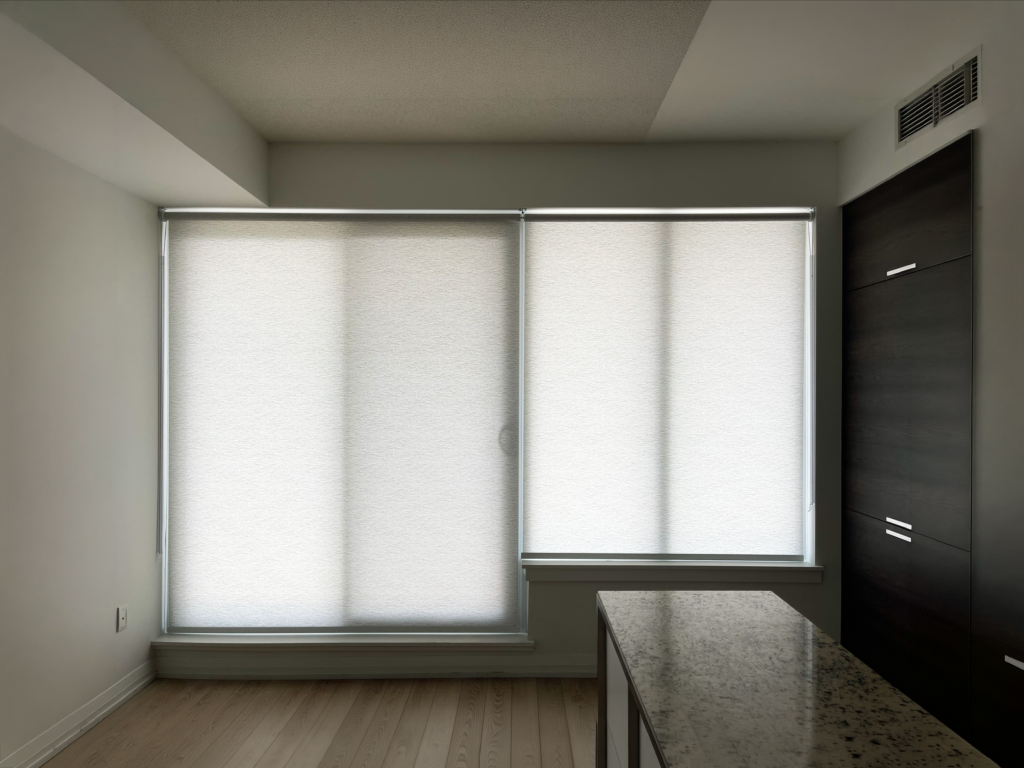
A straight-on, close-up view of a large window wall outfitted with two wide, textured white roller shades. The shades are pulled completely down to the sills, glowing with filtered natural light and creating a clean, minimalist backdrop next to dark espresso-colored cabinetry.
Categories: BlogFAQ

A practical guide to window treatment timelines and budgeting for Toronto new-build owners The most overlooked task after taking possession of a Toronto pre-construction condo is window treatments — and the cost of ignoring it is privacy, energy efficiency, and a fair bit of squinting.   Most new owners spend their first few weeks waiting […]

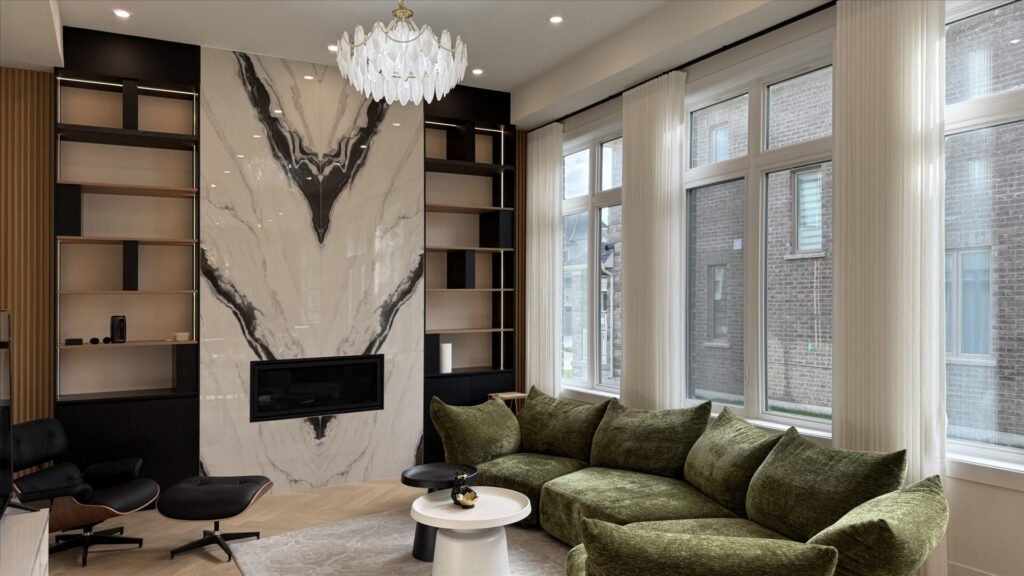
A luxurious living room features a row of tall windows dressed with floor-length, semi-sheer white curtains. The curtains hang from a hidden ceiling track in a crisp, uniform ripple-fold style, subtly framing the glass panes and softening the light beside a large marble-clad fireplace wall and olive green sectional.
Categories: BlogCase Study

Welcome back to the Starlight Design Files — where we pull back the curtain (quite literally) on our most remarkable installations across the Greater Toronto Area. For this edition, we are honoured to share a recently completed full-home window treatment project in Bridle Path, Toronto — one of Canada’s most prestigious neighbourhoods and home to […]

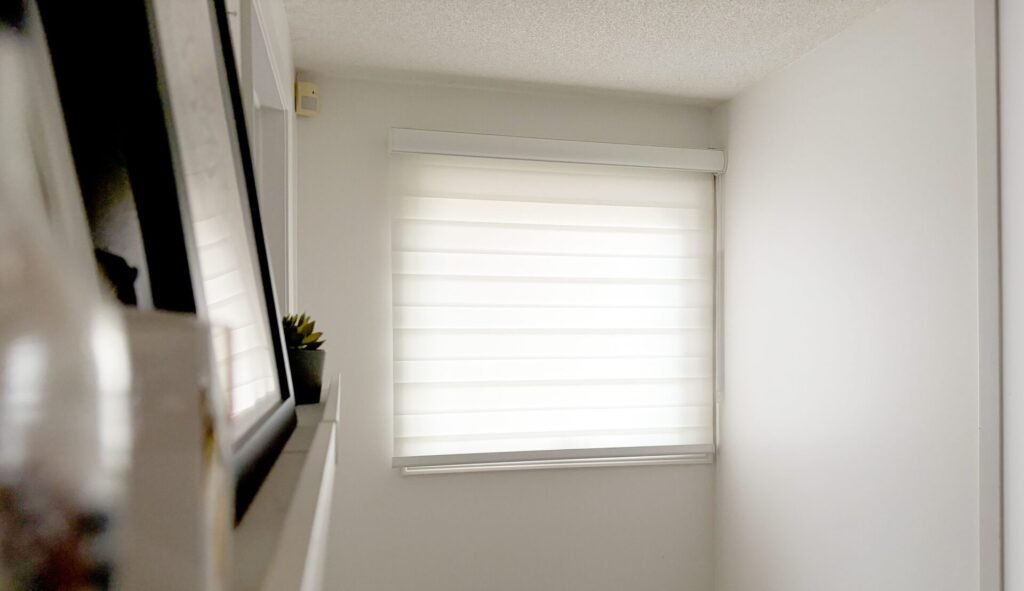
off white zebra blinds in a GTA home
Categories: BlogFAQ

A Straight-Talking Guide from the Team at Starlight Shutter Choosing the right window treatment is one of those decisions that seems simple — until you’re standing in your living room at 9 PM wondering why the neighbor can see right through your “privacy” blinds. We’ve gathered the most common questions our clients ask before they […]

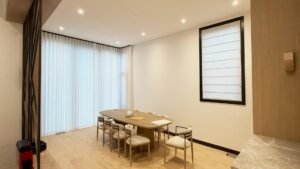
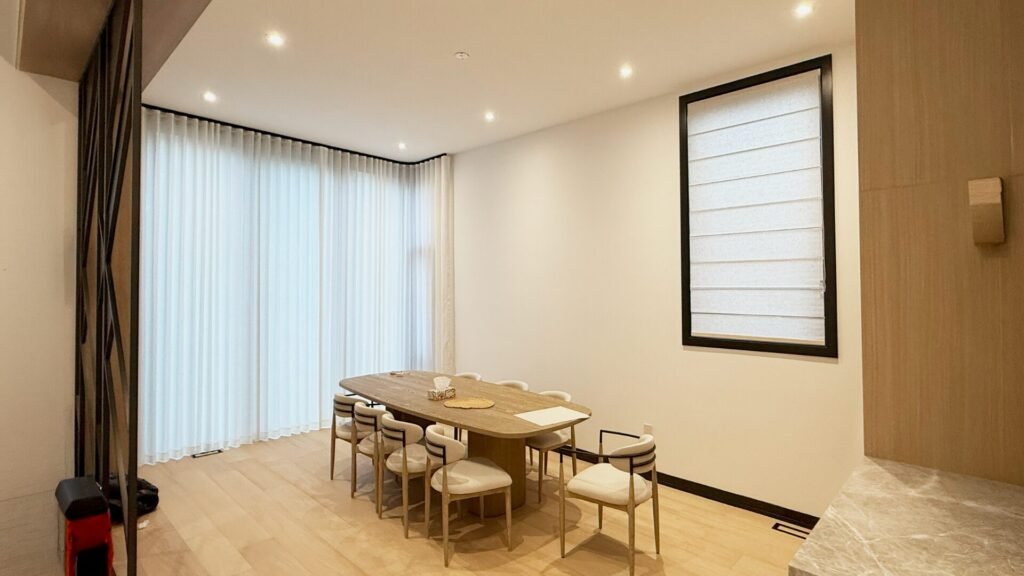
Bespoke window sheers complementing a marble kitchen island and modern dining set in a Toronto home.
Categories: Case Study

Welcome to the latest edition of the Starlight Design Files. Following our successful project in North York, we are excited to share a recently completed full-home installation in the heart of Toronto. First, our goal for this modern residence was to create a seamless blend of luxury and everyday functionality. The homeowners required a solution […]

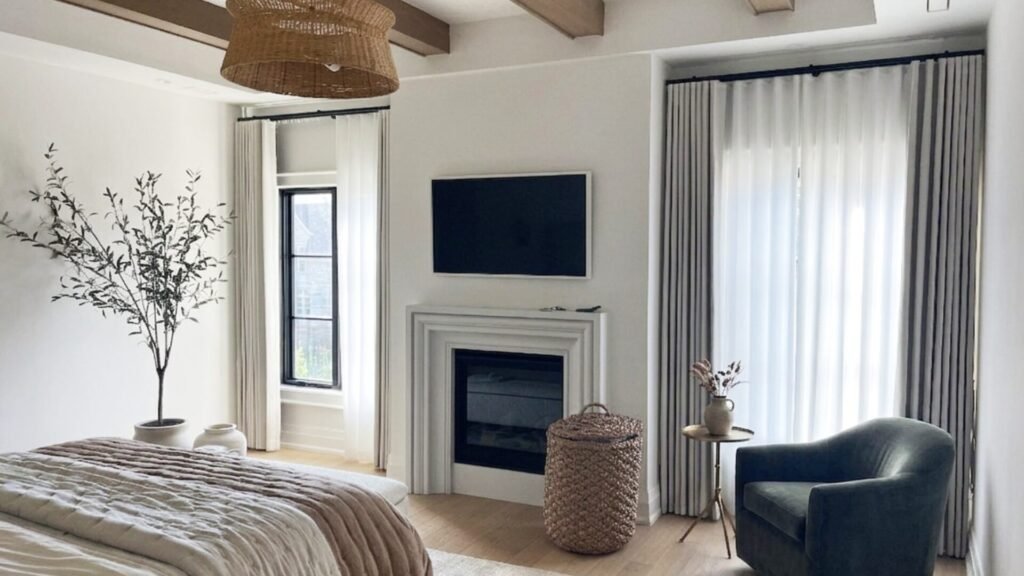
Modern Toronto house bedroom featuring floor-to-ceiling sheer drapes and natural colored blackout curtains.
Categories: Case Study

The Art of the Finishing Touch: Soft Layers for Your Home They say a room is a story. However, it is the final touches that truly bring that story to life. At Starlight Shutter, we believe window treatments are more than just functional. Instead, they are the soft layers that turn a house into a […]

Categories: Blog

At Starlight Shutter, we understand that the journey to finding the perfect window blinds for your home should be seamless and stress-free. Our comprehensive process ensures that every step, from consultation to installation, is a breeze, offering you a hassle-free experience and the window treatments of your dreams. 1. Initial Consultation: Understanding Your Vision – […]

Recent Posts

The First Thing to Do After Moving Into a New Toronto Pre-Construction Condo
2 blinds installed by starlight shutter expert at a toronto new condo living room

A practical guide to window treatment timelines and budgeting for Toronto new-build owners

The most overlooked task after taking possession of a Toronto pre-construction condo is window treatments — and the cost of ignoring it is privacy, energy efficiency, and a fair bit of squinting.


Most new owners spend their first few weeks waiting on furniture deliveries and contractor quotes, making do with bath towels draped over curtain rods or frosted window film. This guide walks you through the correct timeline for window coverings after possession, how to budget realistically, and what to watch out for in Toronto’s unique new-build environment.


Why You Cannot Put Window Treatments Off

After taking possession of a Toronto pre-construction condo, window treatments should be your first home improvement priority — for three reasons: privacy, energy costs, and the unique measurement timeline that new builds require.


Toronto’s high-density developments — particularly in King West, Liberty Village, the Canary District, and along Yonge Street — leave virtually no buffer between you and the building across the street. From the moment you receive your keys, neighbours at eye level can see straight into your suite.


Beyond privacy, Toronto’s floor-to-ceiling window designs, while stunning, are notoriously poor at managing solar heat gain in summer and radiant heat loss in winter. Without window coverings, you are essentially leaving your heating and cooling system to fight against a glass wall.


There is also a less obvious reason to plan ahead: new-build window frames in Toronto continue to settle for three to six months after possession. Measuring too early — before that initial settling is complete — can result in blinds or shutters that no longer close flush. Getting the timing right is the difference between a millimetre-perfect installation and one with an annoying gap on the left side of every roller.

sheer installed by starlight shutter expert in new condo living room

Your Three-Stage Installation Timeline


The recommended approach for Toronto condo owners is a three-stage process: temporary coverage in the first week, precise measurement at weeks two to four, and final installation at weeks six to eight.


Stage One: Possession Week (Days 1–7) — Temporary Coverage

The only goal this week is basic privacy. You are not committing to anything permanent. Recommended options:


  • Static cling frosted film — applies directly to glass, leaves no residue, and works well on the new-build glass coatings common in Toronto high-rises.
  • Reusable clip-on curtain panels — an IKEA MERETE or similar heavyweight panel draped over a tension rod is perfectly adequate for a week or two.
  • Avoid suction-cup hooks — new-build glazing often has a low-emissivity coating that suction cups grip poorly and can mark.


Stage Two: Weeks 2–4 — Professional Measurement

Do not measure your windows on possession day. Wait at least two weeks for the window frames to complete their initial settling. This is the single most common mistake Toronto new-build owners make.


Once you are past that window, book a professional measurement appointment. A few things to confirm at this stage:


  • Verify the builder’s window specs against reality — it is common in Toronto pre-construction suites to find discrepancies of 5 to 15 mm between the quoted and actual frame dimensions.
  • Decide on your mount type: inside mount (the blind sits within the window frame for a clean, architectural look) versus outside mount (the blind extends beyond the frame, visually increasing the apparent height of the window).
  • Check your condo corporation’s rules — more on this below, but some buildings specify that window coverings must appear white or cream from the exterior.


Stage Three: Weeks 6–8 — Installation

Most Toronto window covering suppliers have a fabrication lead time of three to four weeks. Combined with measurement and installation scheduling, allow five to seven weeks from your first appointment to a finished room.


Two things to sort out before your installation date:


  • Confirm your building’s freight elevator booking process — most Toronto condo buildings require 48 to 72 hours advance notice for elevator reservations, and your installer will need exclusive use during the installation window.
  • Verify that your installer is familiar with Toronto Building Code requirements for wall anchoring in concrete construction, which is standard in new high-rises and requires different fixings than drywall.

shades installed by starlight shutter expert at a toronto new condo living room


What Should a Window Treatment Budget Look Like?

For a one-bedroom, one-bathroom Toronto pre-construction condo of approximately 500 to 650 square feet, a complete professional window treatment installation typically falls between $1,800 and $4,500 CAD, depending on materials and level of motorisation.


Here is a practical breakdown by budget range:


Budget Range Typical Configuration Best For
$800–$2,000 CAD Manual roller shades in a single blackout fabric throughout First-time buyers, rental investors
$2,000–$3,500 CAD Honeycomb shades in living area + blackout rollers in bedroom Owner-occupants prioritising energy efficiency
$3,000–$4,500 CAD Motorised rollers throughout with a basic Somfy system Long-term residents who value convenience
$4,000+ CAD Motorised shades integrated with Control4 or HomeKit, custom fabrics High-end owner-occupants, smart home enthusiasts


Energy efficiency tip: Both Enbridge Gas and Toronto Hydro periodically offer rebate programmes for certified energy-efficient window coverings. Cellular (honeycomb) shades are the most commonly approved product category. Ask your supplier to confirm current eligibility before you order — the savings can be meaningful.

2 blinds installed by starlight shutter expert at a toronto new condo living room

The Three Most Common Mistakes Toronto New-Build Owners Make

Toronto pre-construction condo owners most frequently make three window treatment mistakes: measuring too early, choosing fabrics unsuitable for direct sun exposure, and overlooking the building’s installation bylaws.


Mistake One: Measuring on Possession Day

As noted above, new-build frames continue to settle after possession. Measure too early and your installer may arrive to find the blind no longer closes to the sill. The UrbanToronto community forums are full of posts from owners dealing with exactly this issue. Wait at least two weeks before taking any binding measurements.


Mistake Two: Choosing Fabric That Cannot Handle Direct Sun

Many Toronto pre-construction buildings, particularly along the waterfront and in CityPlace, are oriented with significant west or south-facing exposure. Standard blackout fabrics in these suites can fade, crack, or become brittle within three to five years under sustained UV exposure. Look for fabrics with a published UV rating — AATCC 16 or ISO 105-B02 are the standard benchmarks — and ask your supplier specifically about UV degradation performance.


Mistake Three: Ignoring the Condo Corporation’s Installation Rules

Many Toronto condo corporations — particularly in buildings completed after 2015 — include provisions in their Rules and Regulations that govern window coverings. These commonly restrict:


  • Exterior-facing colour (white or off-white is standard),
  • Drilling into window frames or surrounding concrete,
  • The use of tension-mounted rods in certain window types.


Before placing any order, request the Condo Rules and Regulations document from your property management office and review the section on window coverings. A reputable installer will already know your building’s restrictions — but it is worth confirming.

black out roller shades in new condo bedroom

Why Custom-Made Outperforms Off-the-Shelf in New Builds

Pre-construction window sizes in Toronto are not standardised. Custom-fabricated window treatments fit with millimetre precision; off-the-shelf products almost always leave visible gaps that become especially noticeable under direct sunlight.


Toronto builders design window configurations specific to each project. Within the same building, window dimensions can vary by floor, by suite layout, and by orientation. Big-box or e-commerce blinds are produced in two-inch increments — meaning an inside-mounted roller in a 63.5-inch opening will always have at least a one-inch gap on either side.


In a sun-drenched condo, that gap is not subtle. Custom fabrication eliminates it entirely, and typically includes a warranty of three to five years covering both materials and hardware. For a purchase you will live with for a decade or more, the additional cost is almost always justified.


The First Decision You Make Sets the Tone for the Next Ten Years

Window treatments are not decoration — they are the interface between your home and Toronto’s light, temperature, and street-level activity. The six to eight weeks immediately after possession are the ideal window (so to speak) to get this right: the space is empty, tradespeople can move freely, and the building is still in its warranty period.


Starlight Shutter provides complimentary in-home measurement across Toronto — from Liberty Village and King West to Rosedale and Etobicoke. A measurement appointment is not a commitment to purchase; it is simply a chance to understand your options clearly, with no pressure and no jargon.


Book your free consultation at starlightshutter.ca

Case Study Vol. 3: Window Coverings Bridle Path

Welcome back to the Starlight Design Files — where we pull back the curtain (quite literally) on our most remarkable installations across the Greater Toronto Area.

For this edition, we are honoured to share a recently completed full-home window treatment project in Bridle Path, Toronto — one of Canada’s most prestigious neighbourhoods and home to some of the most architecturally refined residences in the country.

The homeowners approached us with a clear vision: every room should feel curated, calm, and considered. From the sweeping open-plan living areas to the intimate spa-like bathroom, our team was commissioned to deliver bespoke window coverings in Toronto that would honour the architecture and complement the interior design — a dramatic palette of arabescato marble, forest-green velvet, herringbone oak, and black steel.

Here is how we transformed each space.


1. The Grand Living Room: Softness Meets Drama

luxury living room with starlight shutter installed white sheer

The Challenge

The living room is the centrepiece of this Bridle Path estate — a soaring open-plan space featuring floor-to-ceiling windows, a bookmatched marble feature wall, and a lush green velvet sectional. The homeowners needed a window solution that could soften the intense natural light pouring in from the south-facing windows while preserving the connection to the outdoors. Bare hardware simply would not do; the treatment itself had to be a design feature.

The Starlight Solution

We installed custom ceiling-mounted ripplefold sheer panels in a warm ivory tone, running the full width of the window wall. The wave-fold heading was chosen specifically for its architectural rhythm — the clean, consistent folds echo the vertical lines of the marble slats and the pleated sofa cushions, creating a beautifully cohesive visual language throughout the space.

Why it works: The ripplefold sheer diffuses harsh daylight into a soft, ambient glow that enriches the green velvet and warm oak tones of the room. The black steel ceiling track disappears against the tray ceiling, allowing the fabric — not the hardware — to take centre stage.

Product Used: Custom Ceiling-Track Ripplefold Sheers | Ivory Linen Blend | Floor-to-Ceiling


2. The Chef’s Kitchen & Open-Plan Living Transition: Two Treatments, One Story

luxury kitchen with zebra blinds

The Challenge

Few kitchens in Toronto command this level of presence. A full-height arabescato marble backsplash, a sculptural gold crystal chandelier, black-framed glass display cabinets, and a dramatic black marble island all compete for the eye’s attention. The window treatment had to play a supporting role — providing privacy and glare control at the sink window without ever upstaging the stone.

At the same time, where the kitchen opens directly into the main living area, a tall angled ceiling transitions between the two spaces. Sheer drapery panels were needed to visually anchor the living zone without blocking the borrowed light from the kitchen — and the challenge was fabricating panels tall enough to suit the angled ceiling line while keeping every fold mathematically consistent from floor to ceiling.

The Starlight Solution

Inside the kitchen, we specified custom zebra blinds (dual sheer shades) across all windows — a deliberate choice that lets the homeowners move fluidly between open, diffused, and private configurations throughout the day. The layered horizontal bands of the zebra blind introduce a subtle rhythm that rhymes with the striped veining of the arabescato marble, creating quiet visual harmony without competing with the stone.

At the kitchen-to-living transition, we manufactured extra-tall ripplefold sheer panels with a custom-adjusted fullness ratio to account for the angled ceiling height. Hung from a ceiling track that follows the line of the tray ceiling, these sheers read as part of the architecture rather than an afterthought. When backlit by the kitchen’s warm LED task lighting in the evening, the fabric glows softly — creating an elegant visual partition between the two zones without closing off the space.

Why it works: These two treatments are designed to speak to each other. The zebra blinds anchor the kitchen in precision and practicality, while the ripplefold sheers at the transition bring softness and flow to the boundary between work and living. Together, they allow this open-plan space to shift moods across the day — bright and energised in the morning, warm and intimate at night. No two sheer panels in this installation are the same height; each was cut and hemmed individually to maintain a perfect floor break across the full width. It is the kind of invisible craftsmanship that defines luxury window coverings in Toronto.

Products Used: Custom Zebra Blinds (Dual Sheer Shades) | Warm White | Recessed Cassette Headrail + Extra-Tall Ripplefold Sheers | Ceiling Track | Custom Panel Heights


3. The Ripplefold Drapery Installation: A Study in Texture

drapery in Toronto Bedrooms

The Challenge

Several rooms in this home shared the same design brief: floor-to-ceiling windows with minimal moulding detail and a need for full light blockage at night — without resorting to heavy, traditional drapes that would feel out of place in the clean, contemporary interior.

The Starlight Solution

We executed a dual-layer ripplefold drapery installation throughout the home’s private rooms: a sheer ivory panel for daytime diffusion, paired with a heavier cream ripplefold drape for evening privacy. Both layers run on the same black ceiling-mounted track, allowing each to operate independently. The corner window installations were particularly demanding — our team engineered a custom curved track that wraps seamlessly around the corner, ensuring the fabric falls without interruption.

Why it works: The secret to this installation is in the fabric selection. We chose two tones of ivory with subtly different textures — one with a fine linen weave and one with a soft cotton-blend crinkle finish. When layered, the two panels create depth and visual warmth that a single treatment never could. This is the kind of detail that interior designers and discerning homeowners truly notice.

Product Used: Dual-Layer Ceiling-Track Ripplefold Drapery | Corner Track Configuration | Custom Fabric


4. The Staircase Foyer: A Statement in Scale

an oversized custom zebra blind that spans the full height of the staircase window

The Challenge

The double-height staircase foyer presented one of the most technically demanding installations in the project. A grand picture window rises nearly five metres from floor to upper landing, serving as the backdrop for a spectacular sculptural chandelier. The window treatment needed to handle this extraordinary scale gracefully — while also providing practical light control for a space flooded with morning sun.

The Starlight Solution

We installed an oversized custom zebra blind — manufactured in a single continuous panel — that spans the full height of the staircase window. The band alignment was carefully calibrated so that, when adjusted, the opaque and sheer bands alternate in perfect proportion with the chandelier’s sculptural glass panels hanging in front of it. The result is nothing short of gallery-worthy: light, glass, and fabric in conversation.

Why it works: Standard blinds simply cannot be produced at this scale. Because Starlight Shutter manufactures all window treatments in our local Toronto facility, we can accommodate custom heights and widths that off-the-shelf products cannot match. Every component — from the tension mechanism to the bottom weight bar — is engineered for long-term performance at this scale.

Product Used: Oversized Custom Zebra Blind | Single-Panel | Extra-Tall Fabrication | Toronto Workshop


5. The Primary Bathroom: Spa-Level Privacy

primary ensuite bathroom with zebra blinds in toronto

The Challenge

The primary ensuite bathroom is a masterclass in restraint — floating wood vanities, a polished marble countertop, warm pendant lighting, and a large window that admits beautiful natural light. Privacy was the primary concern, but the treatment had to feel spa-like rather than utilitarian.

The Starlight Solution

We fitted a custom zebra blind in a crisp warm white — matching the marble tones exactly. The horizontal sheer bands allow soft, filtered light to wash across the polished tile floor even when the blind is fully deployed, creating that luminous glow unique to high-quality sheer materials. The recessed cassette headrail keeps the installation completely clean, with no exposed components at the window head.

Why it works: A bathroom window treatment must do three things: provide privacy, manage condensation, and complement the material palette. Our moisture-resistant zebra blind fabric addresses all three. The warm white colourway reflects the ambient light beautifully, making the bathroom feel brighter and larger — and the tight, clean installation at the frame edge ensures that no light spills in around the edges when privacy is needed.

Product Used: Custom Zebra Blind | Warm White | Moisture-Resistant Fabric | Recessed Cassette Headrail


The Starlight Difference

This Bridle Path project represents everything we stand for at Starlight Shutter: end-to-end craftsmanship, honest design advice, and a product quality that holds up as beautifully in five years as it does on installation day.

Every window treatment in this home — from the largest staircase blind to the smallest bathroom shade — was custom manufactured in our Toronto workshop and installed by our own trained team. We do not subcontract our installations. We do not cut corners on materials. And we back every installation with our comprehensive service warranty.

If you are planning a high-end residential project in Bridle Path, Rosedale, Forest Hill, Lawrence Park, Yorkville, or anywhere across the Greater Toronto Area, we would love to be part of your vision.


Ready to Start Your Project?

📍 Starlight Shutter Inc. serves homeowners and interior designers throughout Toronto and the GTA — including North York, Markham, Scarborough, Mississauga, Oakville, Vaughan and more.

Whether you need custom drapes in Toronto, zebra blinds for a luxury home, or a full-home bespoke window treatment consultation, our team is here to guide you from concept to installation.

👉 Contact us today for a complimentary in-home consultation.

FAQ: Everything You Need to Know Before You Pick Your Blinds

A Straight-Talking Guide from the Team at Starlight Shutter

Choosing the right window treatment is one of those decisions that seems simple — until you’re standing in your living room at 9 PM wondering why the neighbor can see right through your “privacy” blinds. We’ve gathered the most common questions our clients ask before they buy, and we’re answering them the way we’d answer a friend: honestly, clearly, and without the jargon.


living room with blinds

Privacy & Light Control

Q: Do Zebra blinds provide 100% privacy at night, or can neighbors see through the gaps?

This is one of the most important questions to ask before choosing Zebra blinds — and the honest answer is: no, not at night. When your interior lights are on and it’s dark outside, light passes through the sheer alternating bands, and silhouettes can be visible from outside. For rooms where full nighttime privacy matters (bedrooms, bathrooms), we typically recommend pairing Zebra blinds with a blackout liner, or choosing a solid roller shade in blackout fabric for those specific rooms.

Q: What openness percentage (1%, 3%, or 5%) do I need for privacy — can people see inside during the day?

This is the question most clients are really asking when they ask about openness factor. During the day, solar shades work in your favor: the brightness outside makes it very difficult for passersby to see in, even at a 5% openness. However, once the sun sets and your interior lights are on, the equation reverses — the lighter the weave, the more visible your silhouette becomes from outside. For rooms where daytime privacy is the priority (street-facing living rooms, home offices), a 3% openness strikes the right balance between view-through and discretion. For nighttime privacy, no openness percentage of solar shade is sufficient on its own — a blackout liner or dual roller system is the right solution.

To see how they’ll look in your space, you’re more than welcome to book an in-home consultation with us.

Q: Will these blinds prevent my hardwood floors and furniture from fading?

Solar shades in particular are excellent at blocking UV rays — most block 95% or more even at a 5% openness. This meaningfully slows UV-related fading on floors, furniture, and artwork. No treatment eliminates fading entirely, but a quality solar shade is one of the most effective passive tools available for protecting your interiors.


Functionality & Mechanisms

Q: How reliable are the cordless “push-to-lift” mechanisms? Do they lose tension over time?

Cordless mechanisms are very reliable in the first three to five years of regular use. Some spring tension reduction can occur over time, particularly in heavier shades or in rooms with significant temperature swings (like sunrooms). The good news: spring tension on most cordless systems can be reset without replacing the shade. We walk every client through this simple process after installation, and it’s rarely more than a two-minute fix.

Q: Are “Top-Down Bottom-Up” shades sturdy, or do they tend to hang crookedly?

When correctly measured and installed, top-down bottom-up shades are quite stable. Crooked hanging is almost always a sign of incorrect deduction measurements during the sizing process — not a flaw in the mechanism itself. Because these shades carry two operating rails, precision in ordering is critical. This is exactly why we handle measurements ourselves rather than asking clients to self-measure.

Q: Can I have a solar shade for the day and a blackout roller for the night in one system?

Yes — this is called a dual roller or day-night shade system. Two separate fabric rolls are housed in a single headrail: one sheer or solar fabric for daytime use, and one blackout for evenings. It’s a clean, minimalist solution that eliminates the need for two separate sets of hardware. It does require a slightly deeper window frame or ceiling clearance, which we assess during consultation.

Professional Starlight Shutter installer fitting custom roller blinds in a GTA home.


Installation & Fit

Q: My window frame is very shallow — will the blinds protrude (Outside Mount) or fit inside?

Inside mounting requires a minimum frame depth, which varies by product — typically 1.5 to 3 inches depending on the headrail and bracket size. If your frame is shallower than required, an outside mount is the right approach. Outside mounts are actually preferred by many designers as they visually extend the window height and wall coverage. We always check frame depth during our site visit.

Q:How can we minimize the light gaps on the sides of rollers in my bedroom?

Standard roller shades will always have some light gap at the sides — this is inherent to the design. To reduce this significantly, we offer side-channel (U-channel) tracks that guide the fabric edge to the wall, eliminating most lateral light bleed. For a true blackout room, side channels plus a blackout fabric are the combination we recommend.

a blinds with a side channel (U-channel)

Q: My window is 90 inches wide — will a single roller shade be too heavy to operate manually?

At 90 inches wide, a single roller in most standard fabrics is operable manually but can feel heavy with repeated daily use. We typically recommend a motorized solution for widths over 84 inches — it’s more comfortable, extends the life of the fabric and mechanism, and adds genuine convenience. If budget is a consideration, a split (two-panel) installation is another elegant option.


Style & Design

Q: Are vertical blinds “outdated”? What is a modern alternative for my sliding patio door?

Vertical blinds in the traditional vinyl sense are very much a product of the 1990s. For sliding patio doors today, we recommend either a vertical-panel track system (clean, architectural fabric panels that slide like a screen), a wide-format roller shade with a wall-mounted track, or a sheer drapery panel. Each of these updates the look dramatically while keeping the functional need to access the door easily.

Q: Should the blind color match my window trim (white) or my wall color?

There’s no single right answer, but the approach we see working most consistently in high-end interiors is to match the blind to the wall color, not the trim. This recedes the window treatment into the room, making ceilings feel higher and the space feel more cohesive. Matching to white trim is the more traditional approach — it reads as “neat and tidy” rather than architectural. Choose based on the look you’re after.

For more samples of different color combinations, feel free to have a look at our Featured Works.


Professional Starlight Shutter installer fitting custom roller shades in a GTA home.

Practical & Product FAQs

Q: How do I clean the vanes of a Silhouette-style sheer horizontal shade?

Use a can of compressed air or a hair dryer on a cool setting — that’s the safest and most effective method. For stubborn dust, a soft brush attachment on a low-suction vacuum works well. Avoid damp cloths; the vane fabric can distort when wet, and Silhouette-style shades are not submerge-washable.

Q: How long is the wait time for custom Zebra blinds versus standard rollers?

All our blinds are custom-made, with a lead time of 2 to 3 weeks from order confirmation. Zebra blinds typically sit at the higher end of that window due to the precision required in aligning the alternating bands. Lead times may extend slightly during peak seasons — we confirm your exact timeline at order so there are no surprises.


Have a question that isn’t covered here? We’re always happy to talk through the details — no pressure, no sales script. Just honest advice from people who genuinely love this work.

For more information on our blinds, feel free to check out our Product-Blinds section.

Case Study Vol. 2: Modern Drapery & Bespoke Window Treatments – North York

Welcome to the latest edition of the Starlight Design Files. Following our successful project in North York, we are excited to share a recently completed full-home installation in the heart of Toronto.

First, our goal for this modern residence was to create a seamless blend of luxury and everyday functionality. The homeowners required a solution that offered superior light control without sacrificing their stunning views. Consequently, our team provided an end-to-end service, from custom manufacturing in our local facility to precision installation.

Here is how we transformed each space using our high-performance materials and innovative designs.

1. The Living Area: Airy Sophistication

The Challenge

The main living space features expansive floor-to-ceiling glass doors overlooking a lush backyard. However, the intense natural light needed softening to protect the interior finishes and reduce glare.

The Starlight Solution

We installed premium ripplefold sheer panels that span the entire width of the glass. Specifically, these sheers maintain a connection to the outdoors while providing a soft, diffused glow inside. Furthermore, we layered these with modern drapes to add a touch of warmth and texture to the minimalist architecture. Custom white sheer panels and modern drapes installed by Starlight Shutter in a luxury Toronto living room.


2. The Kitchen & Dining Centre: Culinary Elegance

The Design Intent

The kitchen is the heart of this home, featuring a magnificent marble island and warm wood cabinetry. Because this area is used for both cooking and entertaining, the window treatments had to be both stylish and practical.

The Starlight Solution

We continued the cohesive look by installing matching sheer treatments. Notably, the soft folds of the fabric contrast beautifully with the sharp lines of the marble and wood slats. As a result, the dining area feels inviting and sophisticated, whether for a morning coffee or a formal dinner.

Bespoke window sheers complementing a marble kitchen island and modern dining set in a Toronto home.

Bespoke window sheers complementing a marble kitchen island and modern dining set in a Toronto home.


3. The Bedroom: A Peaceful Retreat

The Challenge

For the bedroom, privacy and total light blockage were essential for a restful night’s sleep. Additionally, the large horizontal window required a treatment that didn’t feel bulky in the sleek, modern room.

The Starlight Solution

Our team fitted custom-made blackout drapes that glide effortlessly across the wide window. First, we chose a neutral palette to match the calming grey and navy tones of the suite. Then, we ensured a precision fit to eliminate light gaps. Consequently, the room is now a true sanctuary from the busy city.

Floor-to-ceiling blackout drapes in a modern Toronto bedroom for ultimate privacy and light control.

Floor-to-ceiling blackout drapes in a modern Toronto bedroom for ultimate privacy and light control.


4. The Spa-Like Bathroom: Privacy with Style

The Detail

Even the bathroom received a custom touch. Specifically, we installed moisture-resistant sheer panels that provide effortless privacy while bathing. Ultimately, these treatments turn a functional space into a spa-like retreat, matching the grey marble tiles and sophisticated hardware.

Moisture-resistant sheer curtains installed over a large window in a luxury marble bathroom.


The Starlight Difference

At Starlight Shutter, we go beyond simply offering products. Instead, we focus on building lasting relationships and providing warranties that exceed industry standards. Because we oversee our own workshop, we guarantee that every pleat and fold is perfect.

Ready to transform your vision into reality? Contact Starlight Shutter today for expert advice on custom window solutions that perfectly fit your needs. Let us help you bring your vision to life with the highest quality, style, and innovation in the GTA.

Custom Blinds & Window Shades Toronto | Expert Installation

Starlight Shutter Inc. offers premium custom blinds and window shades in Toronto and the GTA. Our collection includes zebra blinds, roller shades, and motorized window coverings professionally installed by our expert team. Visit our Scarborough showroom at 3781 Victoria Park Avenue for precision-fitted window treatments with a 5.0-star service guarantee.

Service Type: Window Blind Installation Service

Price: $$$$

Currency: CAD

Case Study Vol. 1: Modern Drapery & Custom Window Treatments – Markham

The Art of the Finishing Touch: Soft Layers for Your Home

They say a room is a story. However, it is the final touches that truly bring that story to life. At Starlight Shutter, we believe window treatments are more than just functional. Instead, they are the soft layers that turn a house into a sanctuary.

We do not just produce blinds. On the contrary, we sit down with you to discuss what actually works for your family. Your home deserves a look as unique as your lifestyle. Consequently, we focus on the perfect balance of light and quiet.


1. The Primary Bedroom: Double-Layer Drapery

First, let’s look at the primary suite. We designed these double-layer curtains to balance sunlight and privacy. Because we used color-matched fabrics, the finish looks seamless. As a result, the room feels both cozy and sophisticated.

Modern Toronto house bedroom featuring floor-to-ceiling sheer drapes and natural colored curtains.

2. The Living Room: Translucent Sheer Curtains

Next, we moved to the main living space. In this area, we chose a single layer of frosted sheers. These curtains soften the harsh sun. Furthermore, they keep the room feeling bright and open. Therefore, you get privacy without feeling closed in.

Modern Toronto house living room featuring floor-to-ceiling sheer drapes.

3. The Spa Bathroom: Light-Filtering Roller Shades

Similarly, privacy is vital in the bathroom. For this reason, we installed light-filtering roller shades. These shades ensure complete seclusion. Meanwhile, they still bathe the room in soft, natural light.

Professional Starlight Shutter installer fitting custom roller shades in a GTA home.

4. Children’s Room: Dual Roller Blinds

Safety and health are our top priorities for kids’ spaces. Thus, we chose dual roller blinds for this room. These blinds are completely dust-free. Additionally, they are very easy to clean. Consequently, you can maintain a healthy environment for your little ones with minimal effort.

Professional Starlight Shutter installer fitting custom roller blinds in a GTA home.

5. The Entrance: Privacy Frosted Film

Finally, we addressed the front door. We applied a privacy frosted film to the glass. This provides effortless security. Even so, it still welcomes natural light into your hallway.

Starlight Shutter installed a frosted film to provide effortless privacy at front door while still welcoming the natural light.


Let’s Create Your Sanctuary

In conclusion, the right window treatments change everything. Whether you need sheers for your morning coffee or shutters for a restful sleep, we can help.

Are you ready to add those finishing touches? We would love to help you. Contact Starlight Shutter today for a consultation.

Book A Free Consultation With Us

Discover Starlight Shutter’s Hassle-Free Service To Elevate Your Home

At Starlight Shutter, we understand that the journey to finding the perfect window blinds for your home should be seamless and stress-free. Our comprehensive process ensures that every step, from consultation to installation, is a breeze, offering you a hassle-free experience and the window treatments of your dreams.

1. Initial Consultation: Understanding Your Vision

– Personalized Approach:

  • Our process begins with a one-on-one consultation to understand your style, preferences, and functional requirements.
  • Our knowledgeable experts guide you through our diverse range of options, ensuring your vision is at the forefront.

– Design Exploration:

  • Explore a myriad of design possibilities tailored to your unique taste.
  • Discuss color palettes, materials, and special features that align with your interior aesthetic.

2. Measurement & Design Precision: Crafting Perfection

– Professional Measurement:

  • Once your design is finalized, our skilled professionals conduct precise measurements of your windows.
  • Accurate measurements are crucial for a seamless fit and optimal functionality.

– Customization Options:

  • Tailor your blinds with a range of customization options, from size variations to control mechanisms.
  • Our team ensures every detail is considered, bringing your bespoke vision to life.

3. Fabrication (Factory Direct): Quality Craftsmanship

– State-of-the-Art Facility:

  • Your custom window blinds are fabricated in our advanced, state-of-the-art facility.
  • Our commitment to quality craftsmanship ensures that each piece is meticulously crafted to perfection.

– Factory Direct Advantage:

  • Enjoy the benefit of factory-direct pricing, cutting out middlemen and delivering exceptional value to our customers.
  • Witness the transformation of premium materials into exquisite, custom window blinds.

4. Efficient Installation: Bringing Your Vision to Life

– Professional Installation Team:

  • Our skilled and experienced installation team ensures a hassle-free and efficient installation process.
  • We handle every detail, leaving you with perfectly fitted window blinds that enhance the beauty of your space.

– Quality Assurance:

  • Before completion, we conduct thorough quality checks to guarantee that your custom blinds meet our stringent standards.
  • Your satisfaction is our priority, and we take pride in delivering a flawless end result.

5. Customer Satisfaction Guarantee: Beyond Installation

– Post-Installation Support:

  • Our commitment to your satisfaction extends beyond installation.
  • Reach out to us for any post-installation queries, adjustments, or additional support—we’re here for you.

– Warranty Coverage:

  • Rest easy with our comprehensive warranty coverage, providing peace of mind and assurance in the longevity of your investment.


At Starlight Shutter, we believe that the process of choosing and installing custom window blinds should be a joyous and stress-free experience. From the initial consultation to the final installation and beyond, our team is dedicated to ensuring your vision becomes a reality. Elevate your home with our hassle-free service, and let Starlight Shutter be your partner in creating a space of timeless elegance and unparalleled comfort.